How to Make a Simple DIY Craft Kalimba for Kids
Make a Homemade Kalimba to Study Music in Your Next ESL English Class
In my English classes, I always try to incorporate fun activities to keep my ESL students motivated and excited. So I decided to make a DIY craft kalimba with my students at Step by Step Kids Eikaiwa in Japan. It was a fun experience to learn about the unique African instrument. We could also study English related to music and making instruments for kids.
After learning the English words for the materials to make DIY craft kalimbas (paper bowl, popsicle sticks, glue, wood, etc.) , we practiced words related to music (long, short, high, low, sound, note, etc.) If you have more time for this lesson, you can also study other instruments in English and practice the questions, “Can you play the piano?” and “What instrument can you play?” for example.

How to Make Your Own DIY Craft Kalimba from Paper Bowls
What You Need To Make A DIY Craft Kalimba with Kids
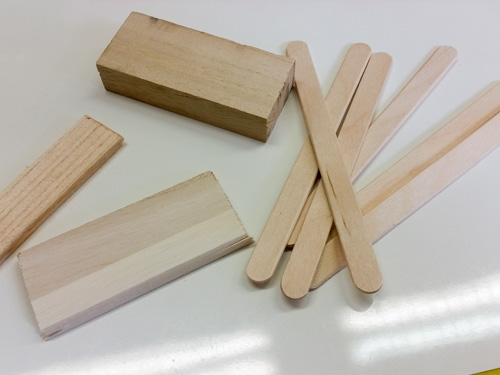
- Two sturdy paper bowls (or plates, or container like a wood box)
- Popsicle sticks
- Wood glue (this takes a while to dry but it’s stronger than hot glue)
- Two pieces of wood for the bridge ( 1.5cm x 3cm x 7cm is a good place to start, but experiment to get different tones and sound quality)
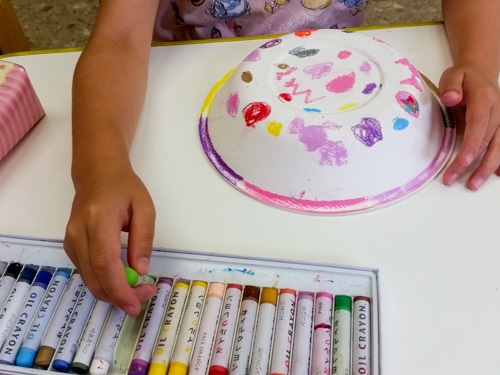
- Scissors, markers, crayons, other decorating supplies
Instructions for Making a DIY Craft Kalimba
Step 1

Step 2
Glue the wood onto the bowl near the hole in the top half. After that, add a thin line of glue to place the popsicle sticks.

Step 3
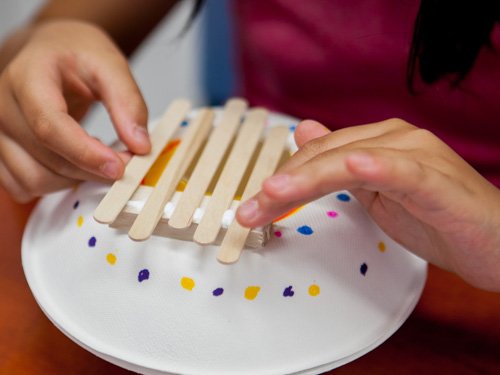
Arrange the Popsicle sticks how you like. Make sure to explain to the students the relationship between the length of the Popsicle stick and the note it makes. Having a sample kalimba already assembled is a great way to demonstrate this. We found that longer Popsicle stick placement had a better sound quality.
Step 4
After the Popsicle sticks are in place, add another strip of glue over them. You can use a lot of glue this time to make the bridge sturdy. At this point you should wait for a few hours (actual time depends on type of glue and materials.) We waited for 24 hours and tried them out in the following lesson. Check out the videos below to see the results.

The Results

Fun English Lessons with Real English Conversations
Need more great ideas for fun and easy classroom crafts?
Check out all these cool activities and crafts that are not only quick and easy to make, but also super fun for students.
Greetings Clock (Good morning, afternoon, evening, night) – Free Craft Template
Use this cute and fun "Good Morning!" Spinning Clock ...
5 Battle Eggs EFL/ESL Card Game Variations
Try these 5 Battle Eggs EFL/ESL Card Game variations ...
5 Free Custom Photo Snow Globe Templates
Make an original snow globe with these 5 Free ...
7 Free Interactive Christmas Games for Online Lessons
7 Free Interactive Christmas Games and Activities for Teaching ...
Free Christmas Present Shooting Game (10-Minute Craft)
Make a Plastic PET Bottle Present Blaster in less ...
Free Ghost Blaster Shooting Game (10-Minute Halloween Craft)
Are you ready to make a plastic PET Bottle ...
World’s Easiest Chocolate Mug Cup Cakes (microwave recipe)
The World's Easiest Chocolate Mug Cup Cakes will turn ...
Pen Pan Flutes – Musical Instrument Kids Crafts
Make These Super Easy Pen ...
ESL/EFL Origami Craft – Paku Paku Fortune Tellers
ESL/EFL Origami Crafts are a ...
Easy 3D Reindeer Christmas Card Craft – (Free Instructions)
This cute and simple 3D Reindeer Christmas Card Craft ...
Light-up Ghosts | Super Easy Halloween Kids Crafts
These light-up ghosts make super ...
Quick and Easy Volcano Experiment with Tape (10-Minute Classroom Crafts)
Make a Quick and Easy ...
How to play “Spell Chomp Spell” Game with ABC Chompers
Learn how to play SPELL CHOMP SPELL! A ...
Super Easy Marshmallow Cereal Shape Snacks Recipe & Lesson Plan
Delicious Fun in Your Next English Class with Our ...
No-Mess, No-Carve Jack-O’-Lantern Halloween Craft
Are you looking for a fun, cheap and easy ...
DIY Light Ghost Halloween Decorations
Need some fun, easy, and cheap Halloween decorations for ...
Colors, Shapes, and Animals – Super Cute Crafts for Kids
Practice shapes, colors, and animals with these super-cute ESL/EFL ...
DIY Paper Craft Animal Hats (Bunny, Frog, Monkey, Dinosaur)
Make these cute and fun DIY paper craft animal ...
10-Minute ESL Crafts: English Reading Word Spinners for Phonics Practice
Forget Fidget Spinners! English Reading Word Spinners are the ...
“Slime In A Bag” | Super Easy, No-Mess Instructions – 10 Minute ESL Crafts for English Class
Students will love making this super easy, no-mess "Slime ...
Erupting Volcano! – 10 Minute ESL Class Crafts
Make an erupting volcano in 10 minutes for your ...
Top 5 Awesome ESL Activities With Less Than 1 Minute Preparation
Learn Our Favorite Effective Classroom Activities Which Need No ...
ESL Cookie Recipe and Worksheet
Learn English While Making This One-Of-A-Kind ESL Cookie Recipe ...
DIY Craft Kalimba – Homemade Instruments for Kids
How to Make a Simple DIY Craft Kalimba for ...


